ServiceTitan
By LiveSwitch
Description
The LiveSwitch platform integration with ServiceTitan allows LiveSwitch customers who use ServiceTitan's field service management software to:
- View LiveSwitch media automatically linked in ServiceTitan
- Sync ServiceTitan job, customer and location records with LiveSwitch contacts
Install the ServiceTitan Integration
Need help? Contact [email protected] — we're here to assist you.
Features & Functionality
Automatically sync ServiceTitan jobs with LiveSwitch projects
When you connect the app, LiveSwitch begins pulling in all of your active ServiceTitan jobs. Each job becomes its own project in LiveSwitch, ready to store files and media tied to that job record.
Organized project structure
In LiveSwitch, each project name matches the corresponding ServiceTitan job, serving as a dedicated workspace for that job. These start as empty containers that you can fill with photos, recordings and documents.
Direct project links in ServiceTitan
LiveSwitch automatically pins a link to each associated project at the top of your ServiceTitan job notes. This makes it easy for any team member to go right to the related LiveSwitch project.
Effortless file syncing
When you upload content into LiveSwitch, selecting the appropriate project ensures those files instantly sync back to ServiceTitan. Notes are created in the corresponding job, location and customer records with direct links to each uploaded media.
Flip the SwitchEnhance ServiceTitan Integration features and functions with the LiveSwitch Launcher Chrome extension to access interactive media directly on the ServiceTitan job, location and customer record. Install the Chrome extension
Installation
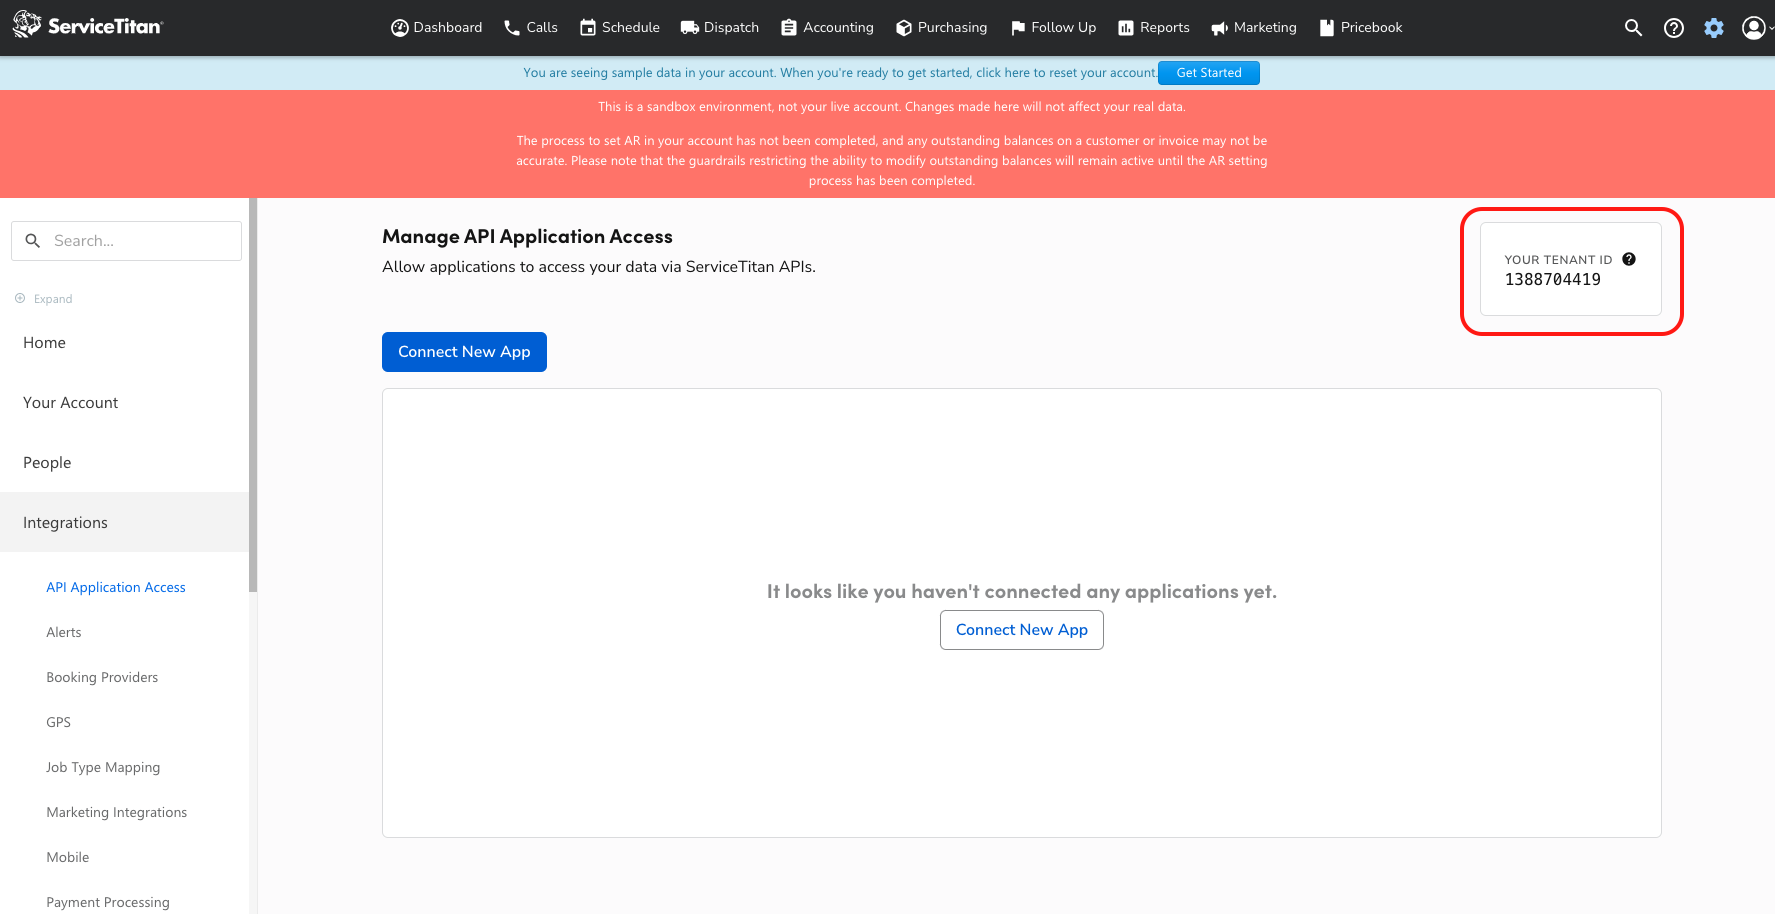
Step 1: Log in to your ServiceTitan account and find your Tenant ID
To find the ServiceTitan tenant ID, go to your ServiceTitan dashboard and select the gear icon in the upper right header. From there, select "Integrations" in the left hand menu and then "API Application Access" from the expanded menu.

On the resulting screen, you will see your tenant ID in the upper-middle right of the screen.
Step 2: Send your ServiceTitan Tenant ID to LiveSwitch so we can grant you access
Now that you have your tenant ID, send an email to [email protected] with your tenant ID. Below is a draft email you can use. Substitute <tenant ID> with your tenant ID. We typically complete this step in just a few minutes, at which point you can continue with Step 3.
EMAIL TEMPLATE
Subject:
Request Access to LiveSwitch/ServiceTitan Integration
Body:
Hello,
I would like to install the LiveSwitch/ServiceTitan integration. My tenant ID is <tenant ID>.
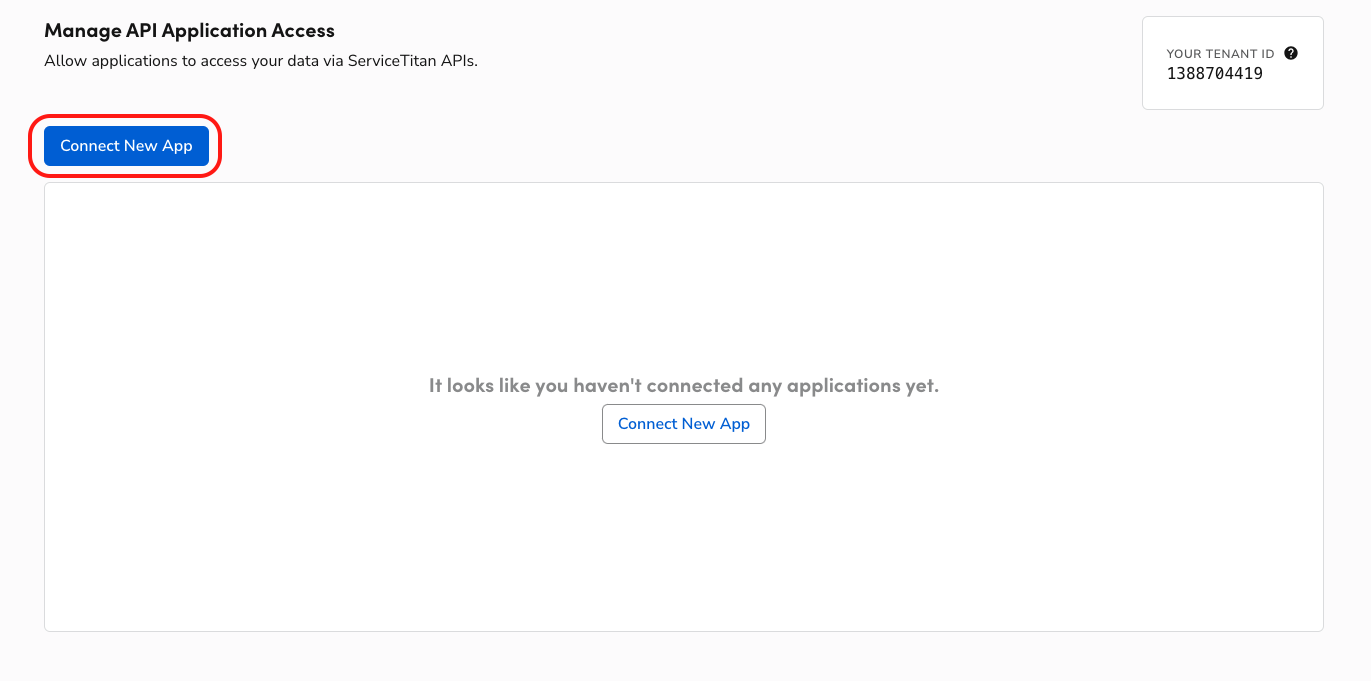
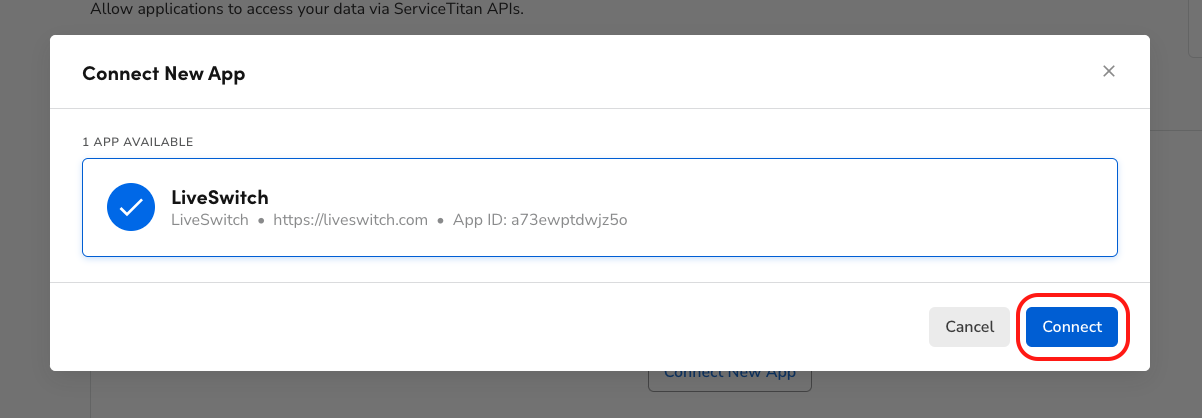
Step 3: Connect the LiveSwitch App in ServiceTitan
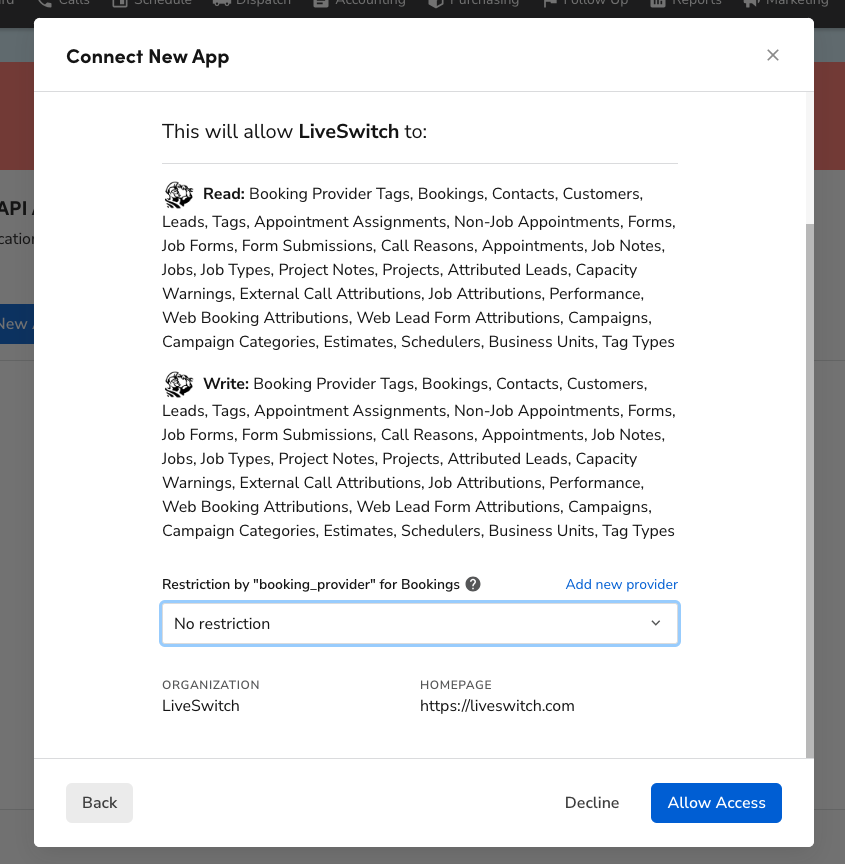
Once you have confirmation from LiveSwitch that you have been added to the integration, select the "Connect New App" button on the same page you found your tenant ID. On the popup screen that follows, select the LiveSwitch app and hit "Connect." On the following screen, set the "Booking Provider Restriction" input to "No Restriction" and hit "Allow Access."
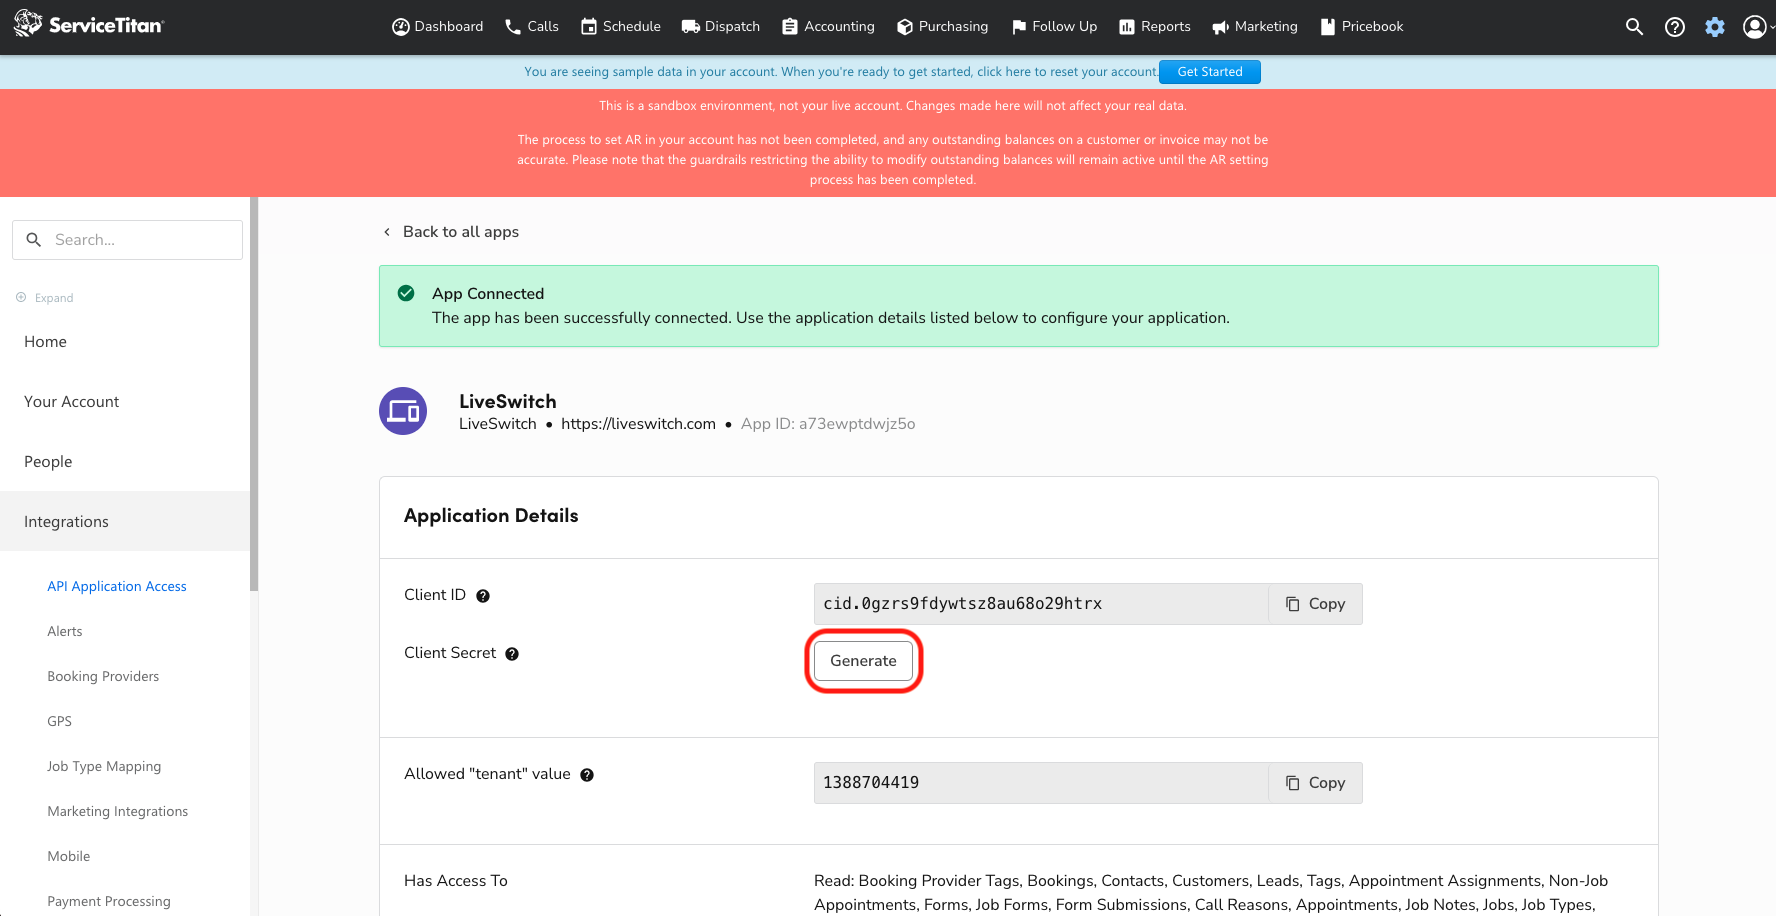
Step 4: Get your Client ID and Client Secret
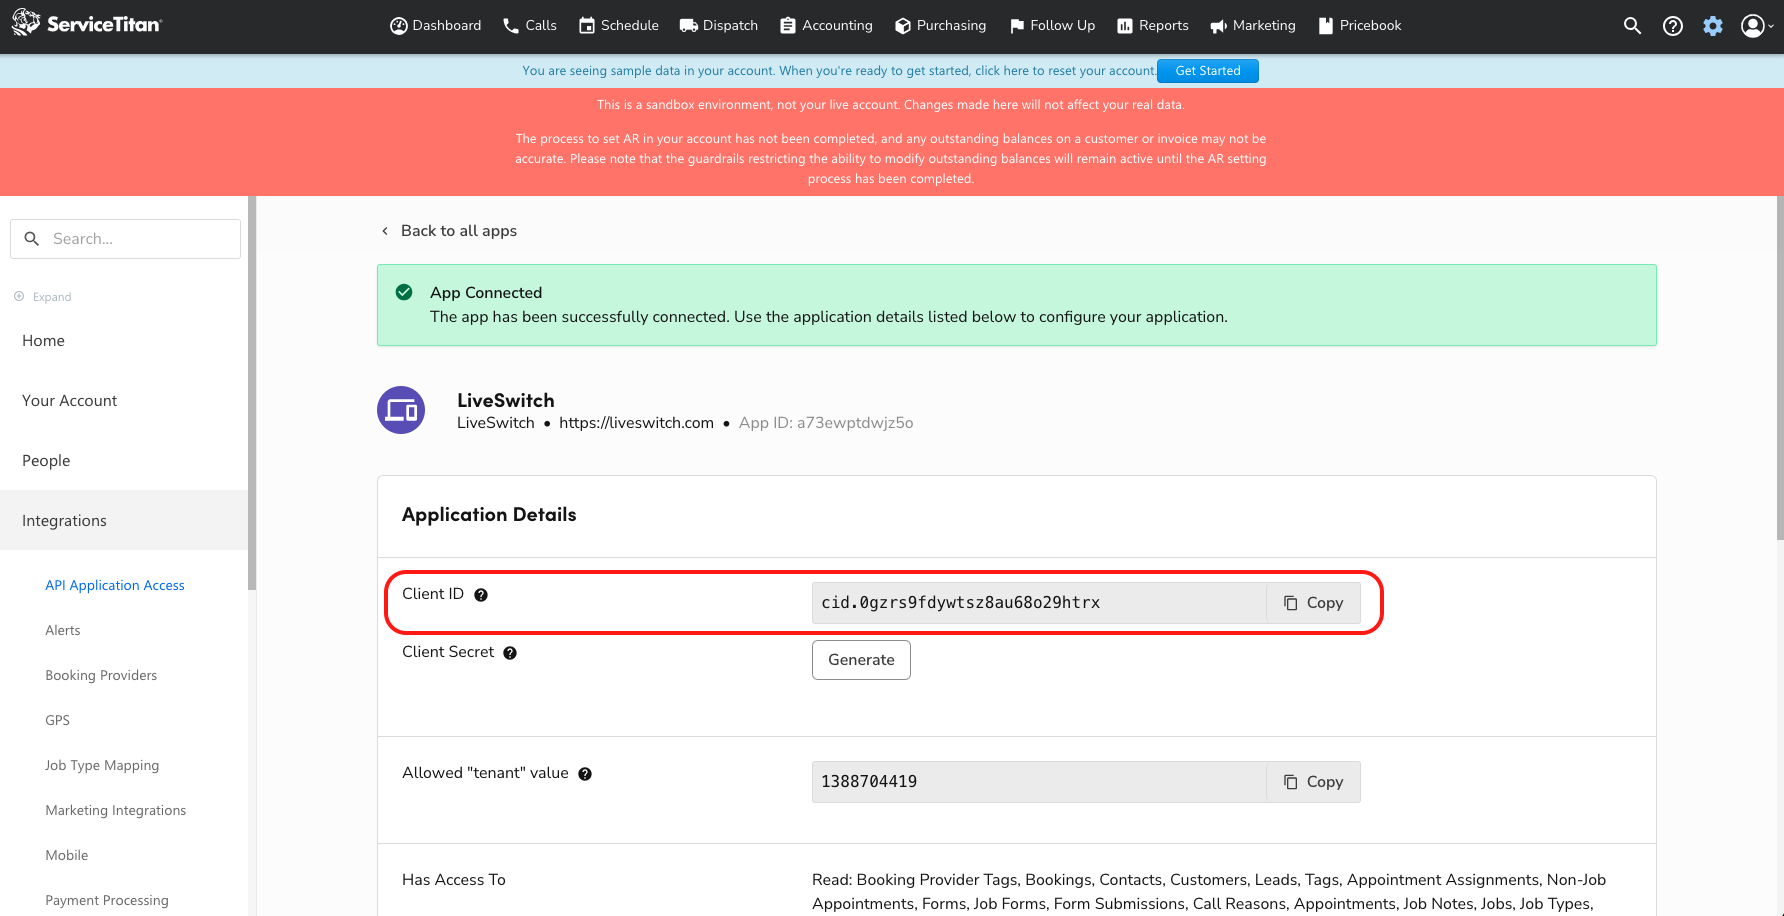
Once you have connected the LiveSwitch App, you should see the following:
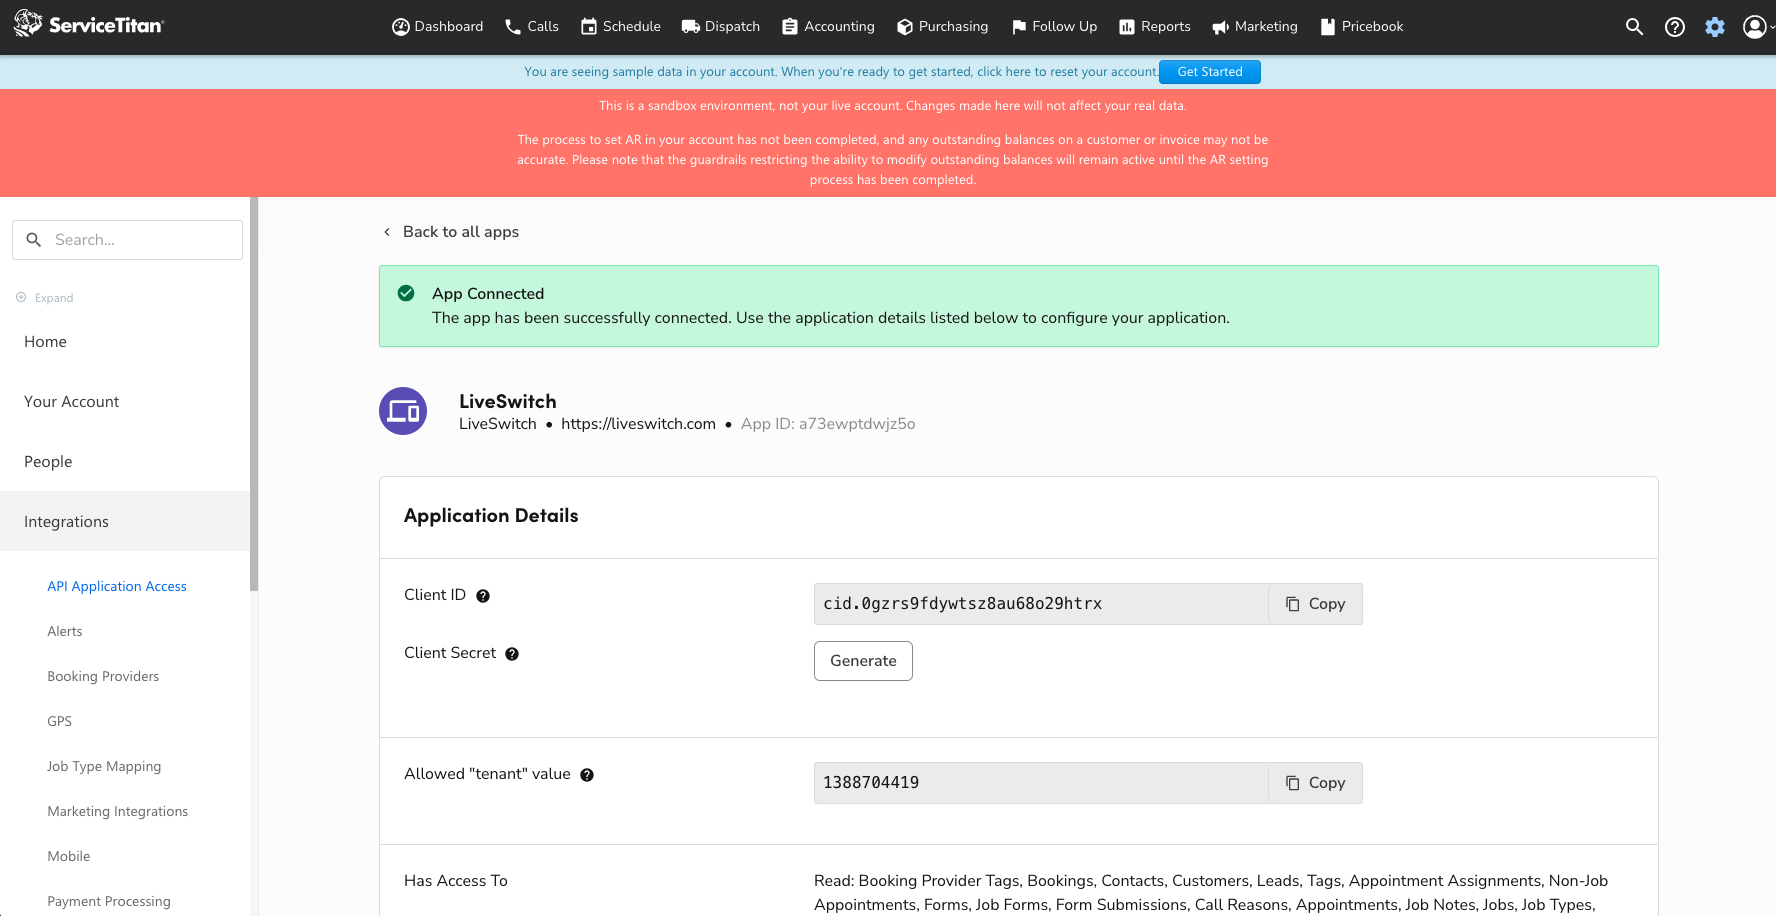
You will use the Client ID and Client Secret, as well as the Tenant ID from Step 1 to finish connecting the integration. First, copy the Client ID and put it somewhere you can access it later. Second, generate a Client Secret by selecting the "Generate" button.
It is important that you copy the client secret and put it somewhere you can copy it later. After you close the popup, you will no longer be able to view the client secret again.
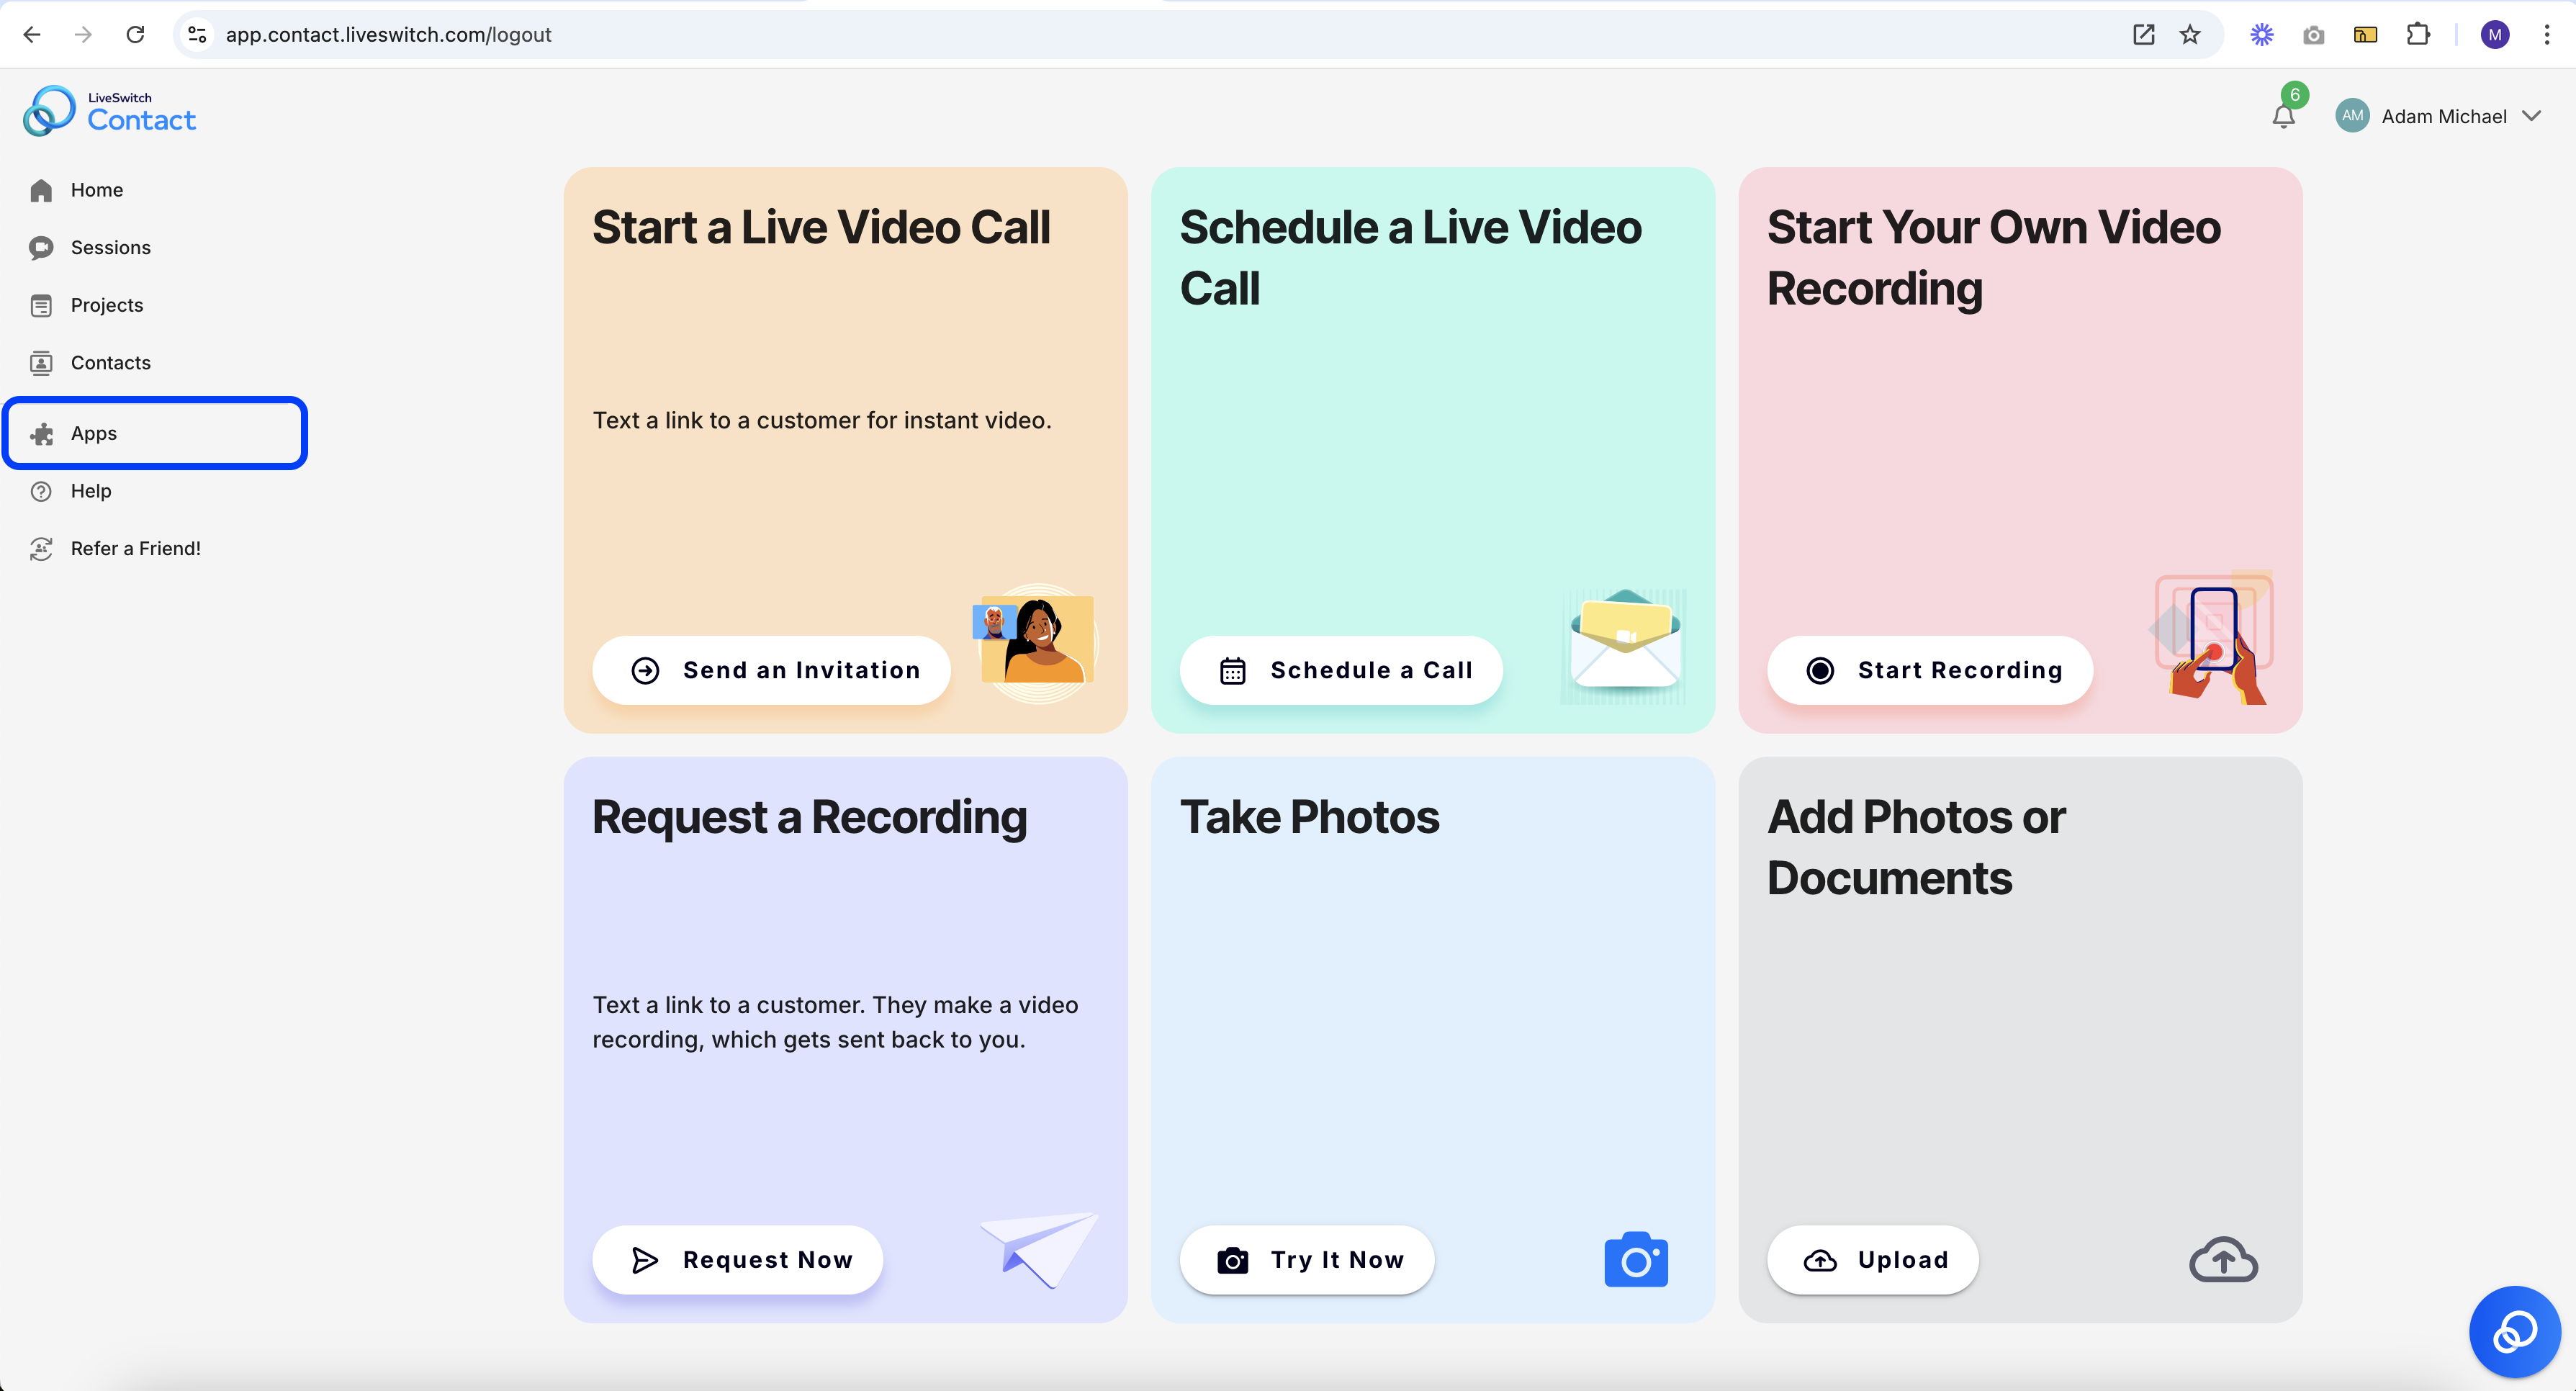
Step 5: Log in to your LiveSwitch account
If you are not already logged in, go to https://app.contact.liveswitch.com and log in to your LiveSwitch account.
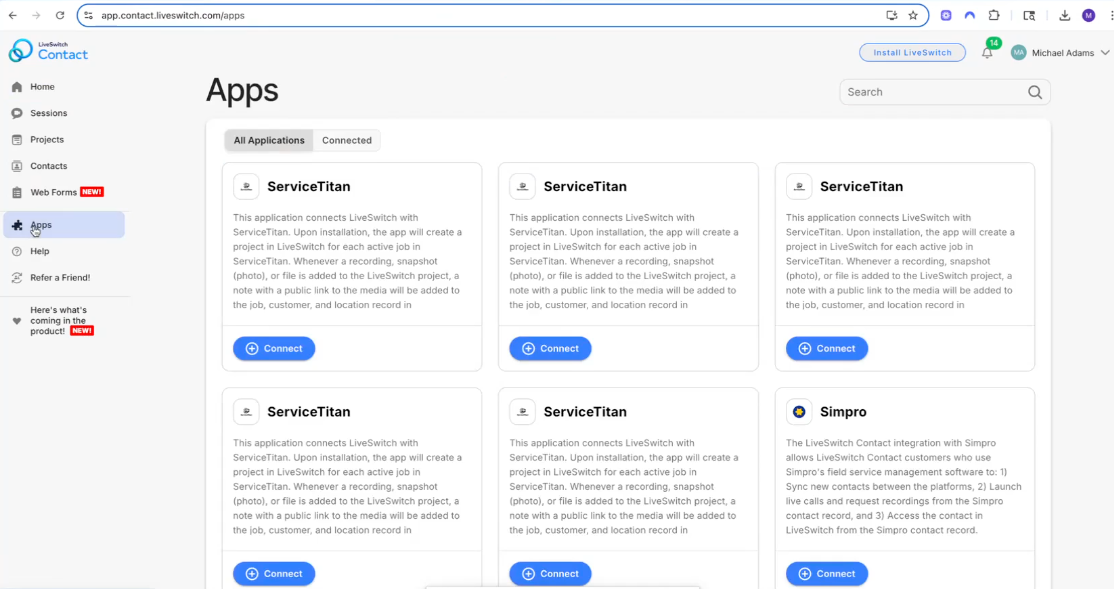
Step 6: Go tohttps://app.contact.liveswitch.com/apps to access the LiveSwitch app marketplace
You can access the app marketplace by going directly to that account or selecting the "App" menu item in the left menu bar.
Access via URL:
Access via 'Apps' menu item:
Step 7: Select 'Connect' on the ServiceTitan App
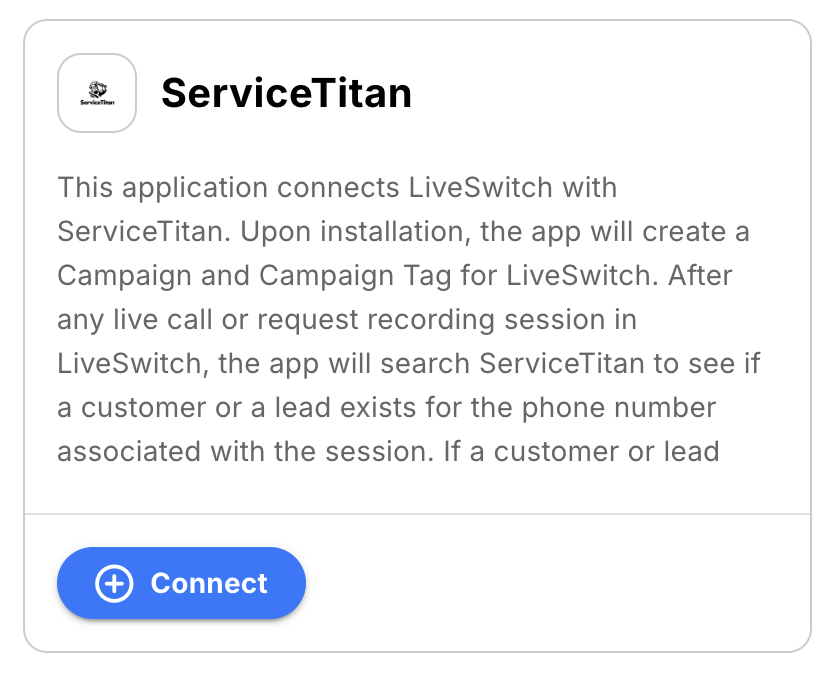
Step 8: Authorize LiveSwitch to access ServiceTitan
When you select the 'Connect' button, a new tab will automatically open that initiates the authentication process.
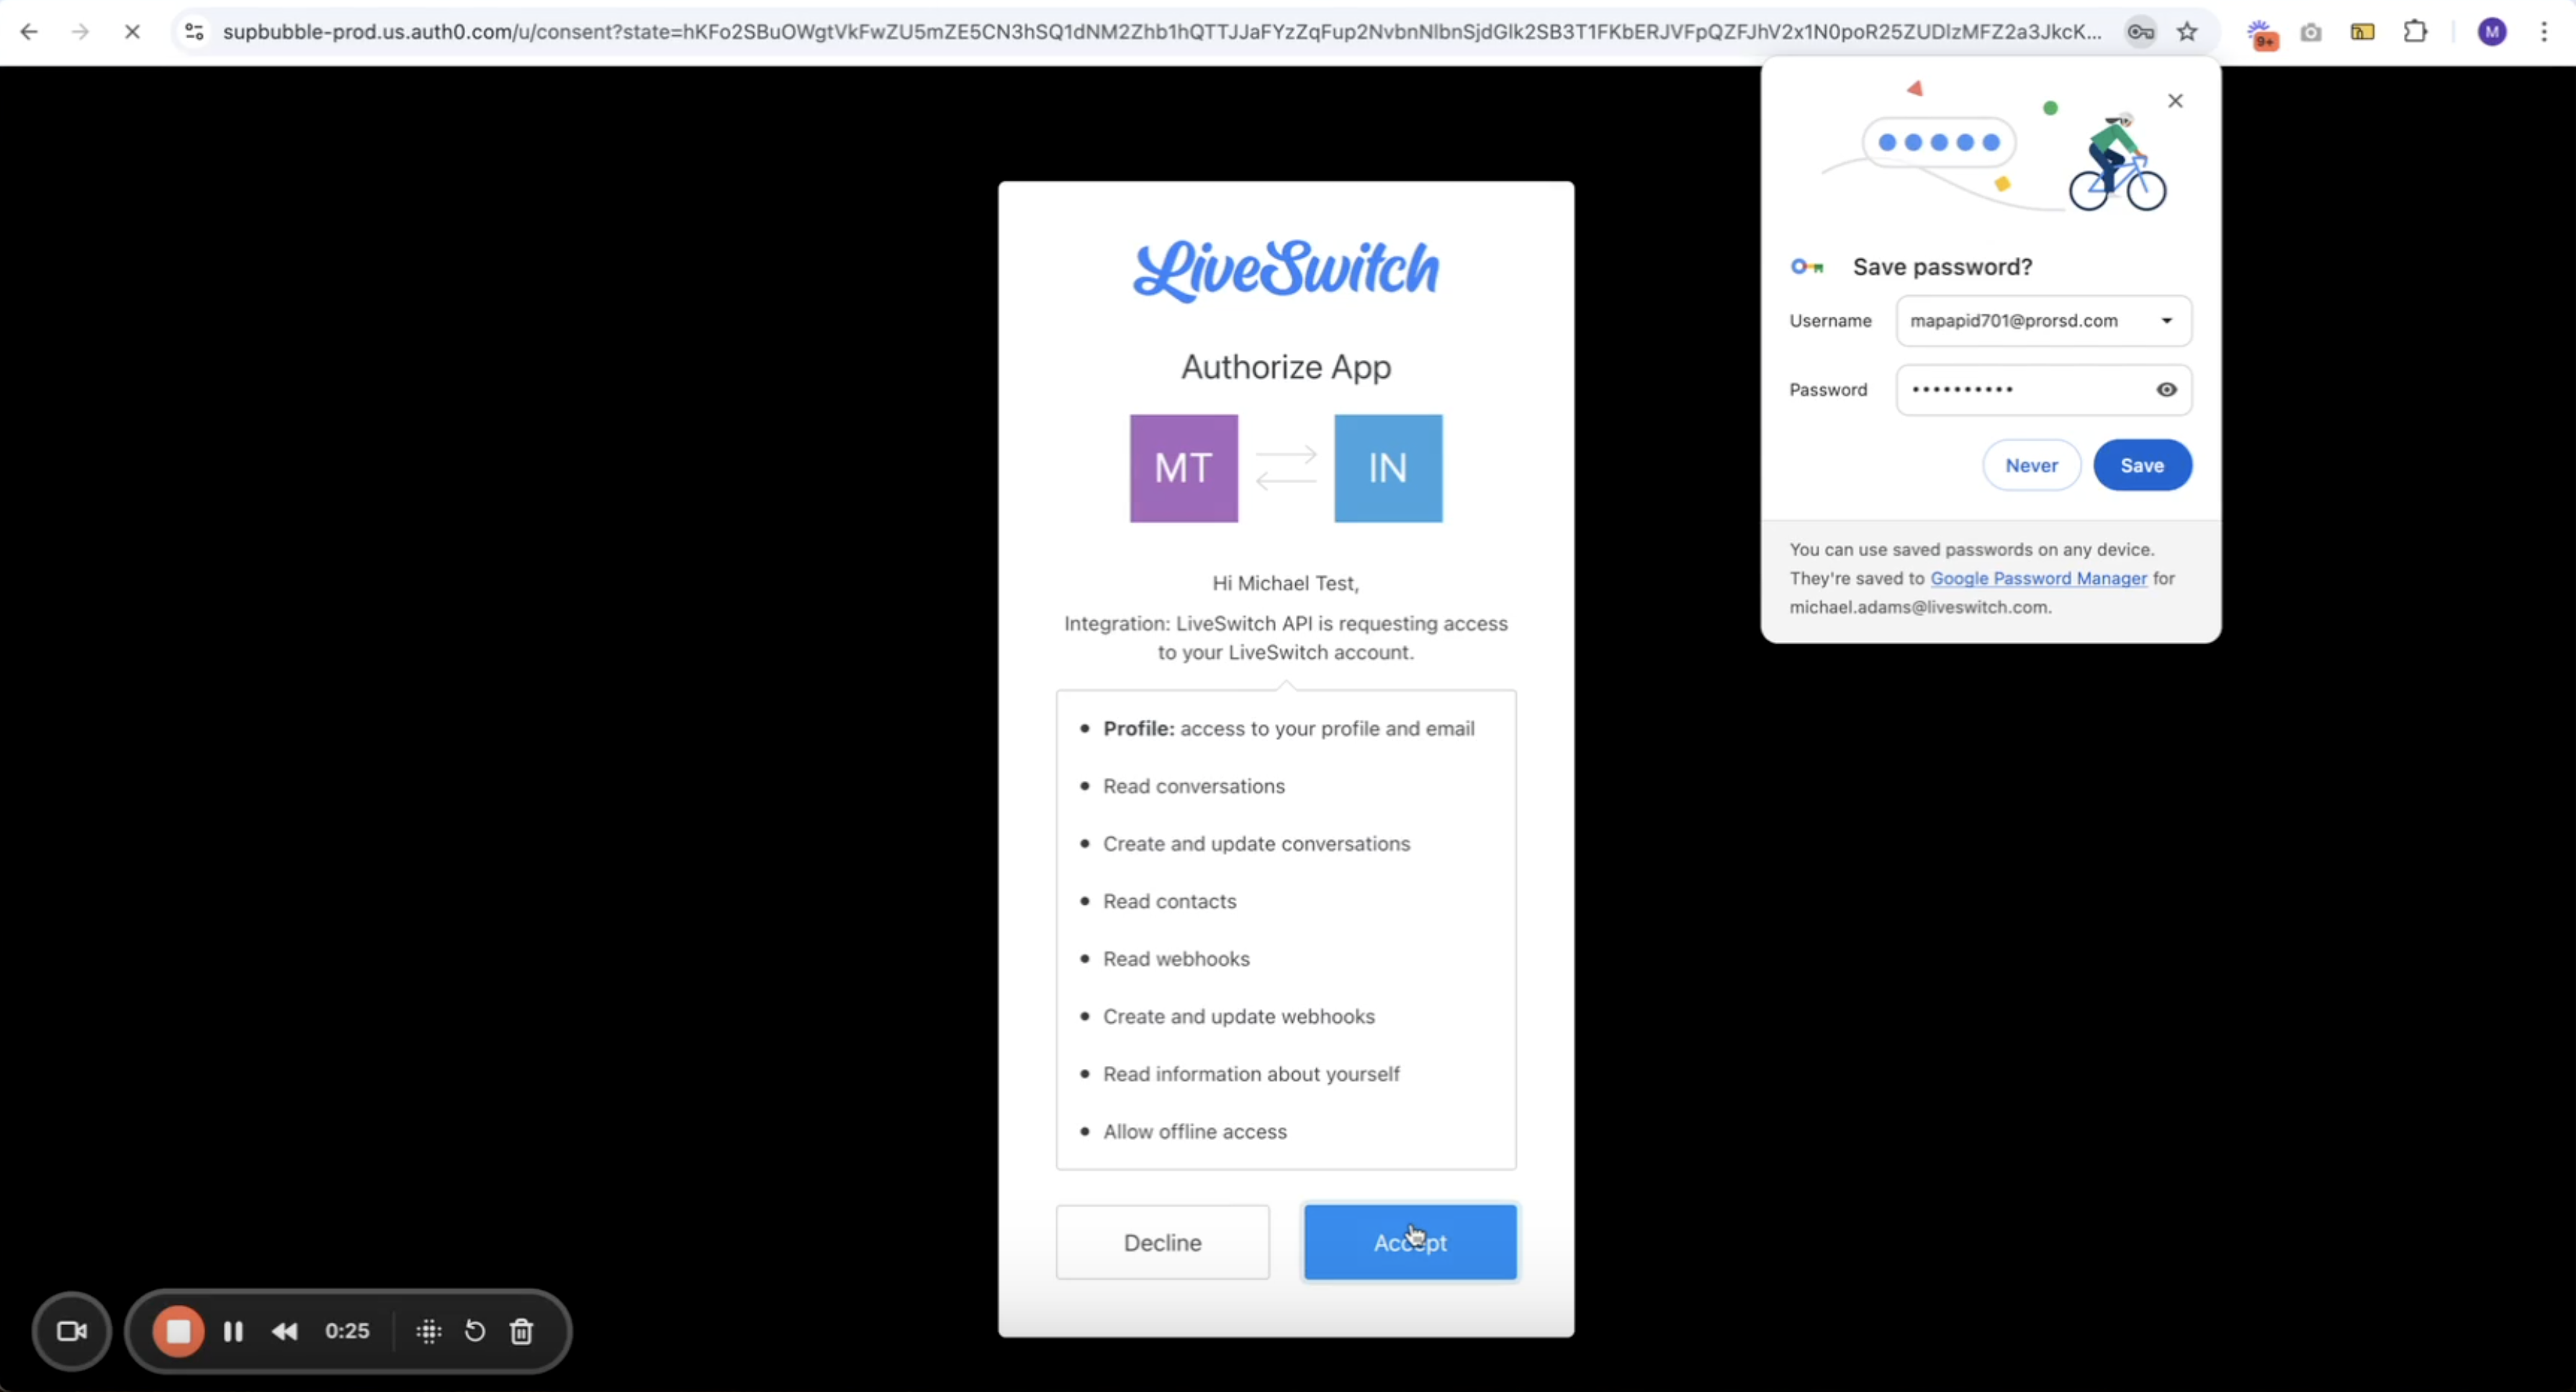
First, we will authenticate your LiveSwitch account with the LiveSwitch API. When the screen below appears, select 'Accept' to continue.
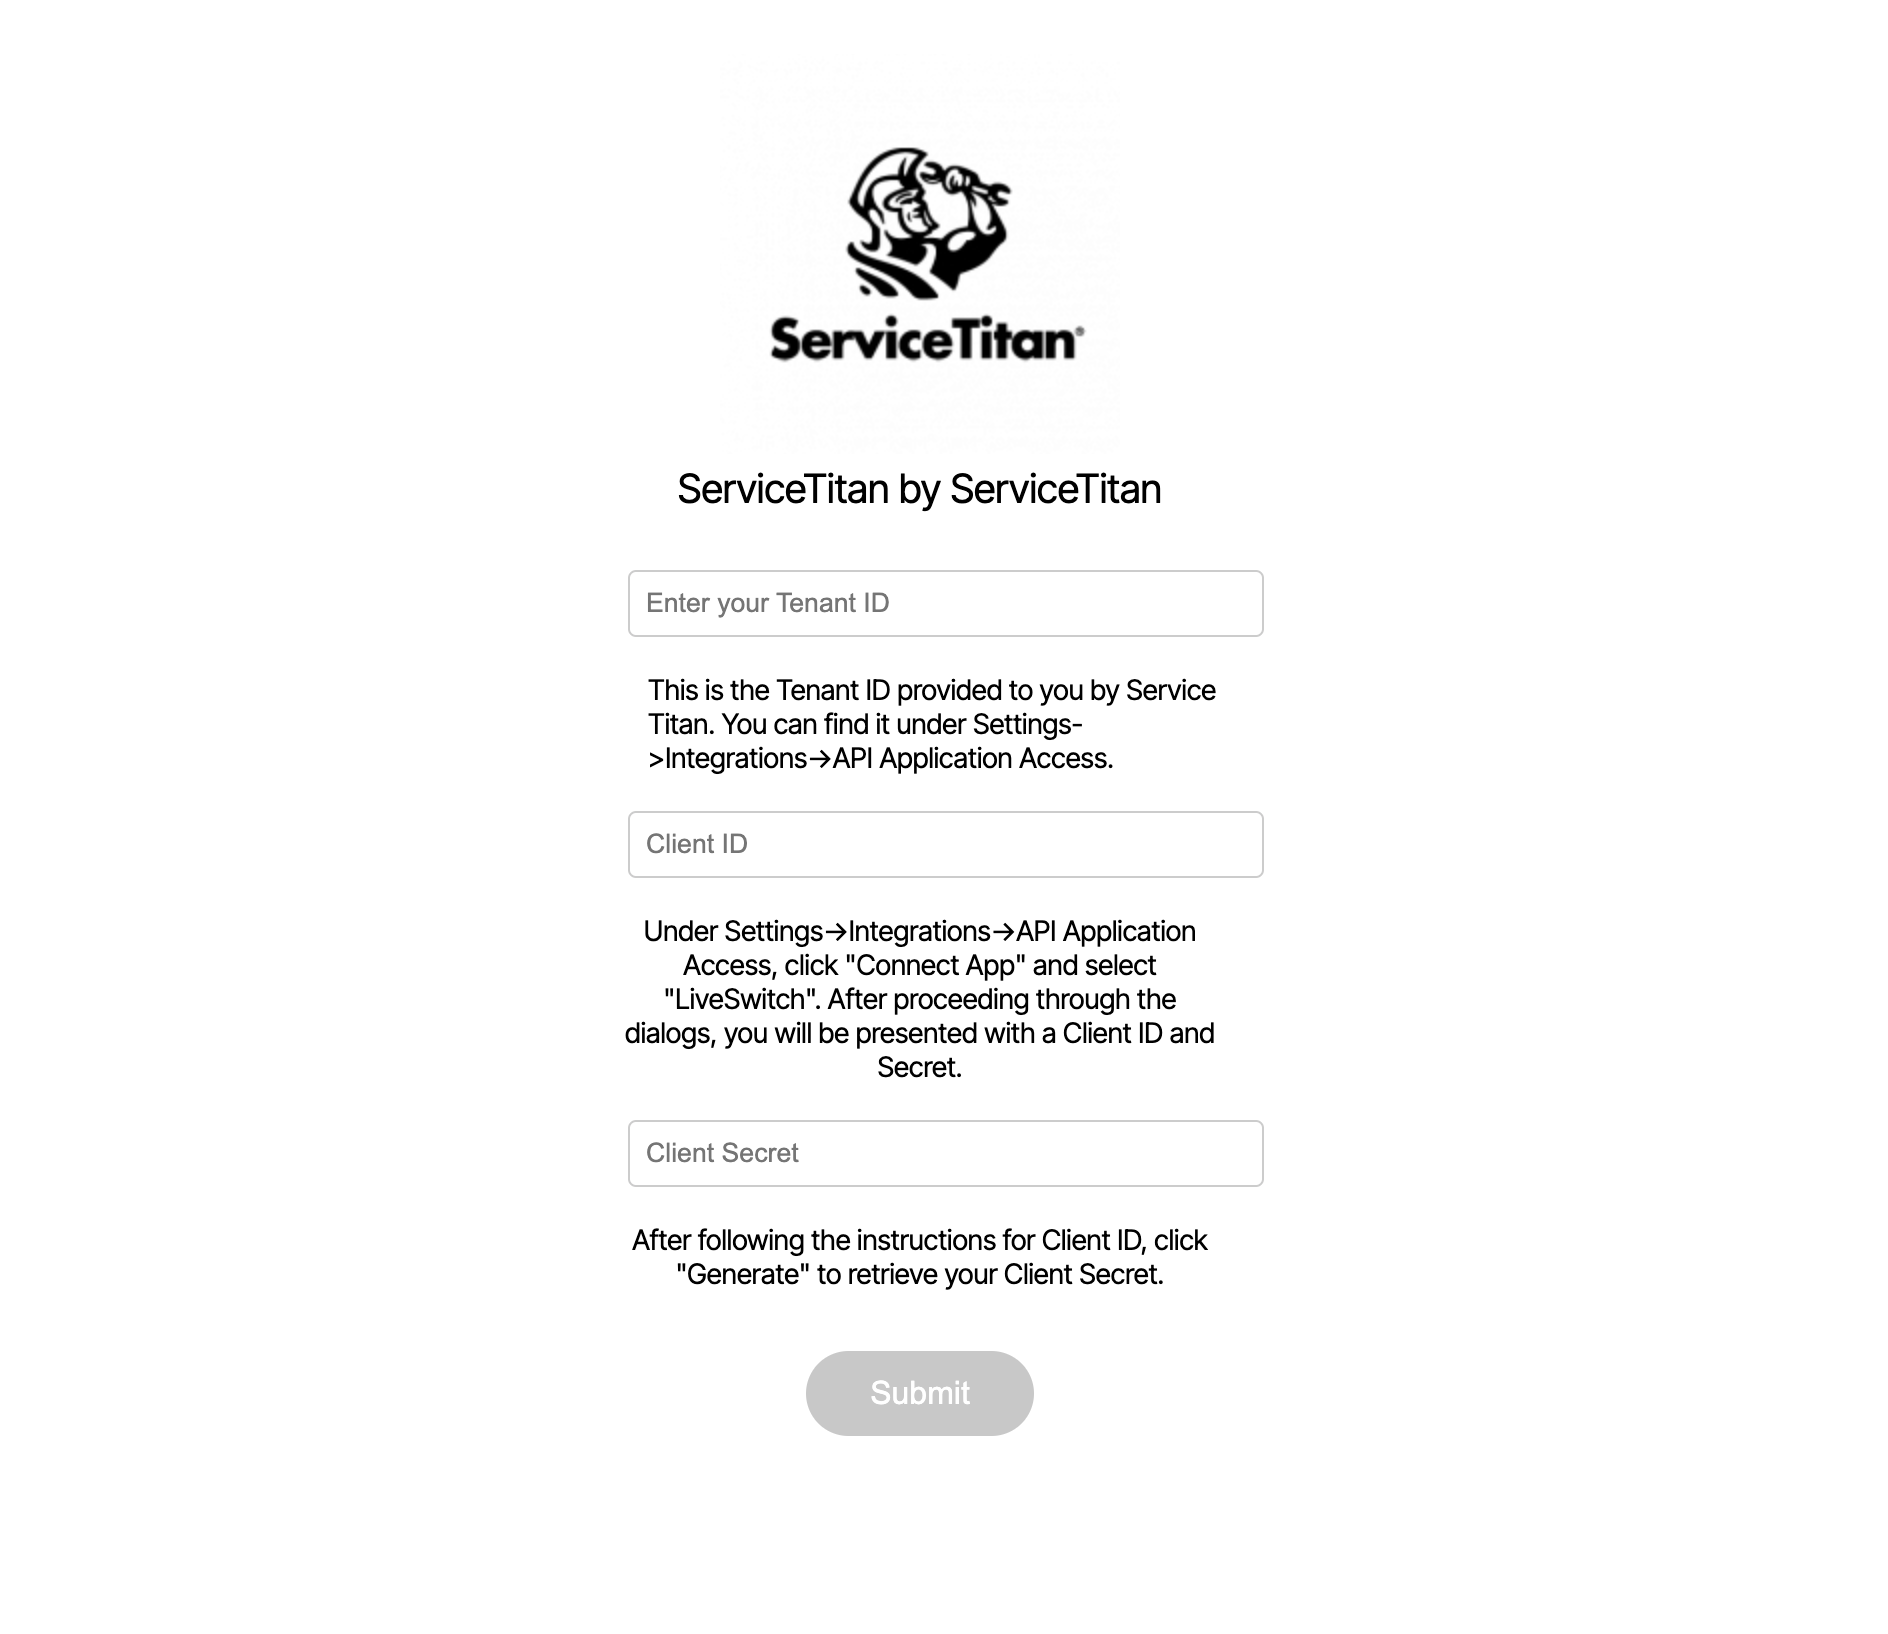
Second, we will begin the authentication process with ServiceTitan. Before we kick you over, we will need to configure some values in ServiceTitan and input them into the screen below. These are the same values from Step 1 and Step 4 above. Once you have entered the values, click 'Submit.'
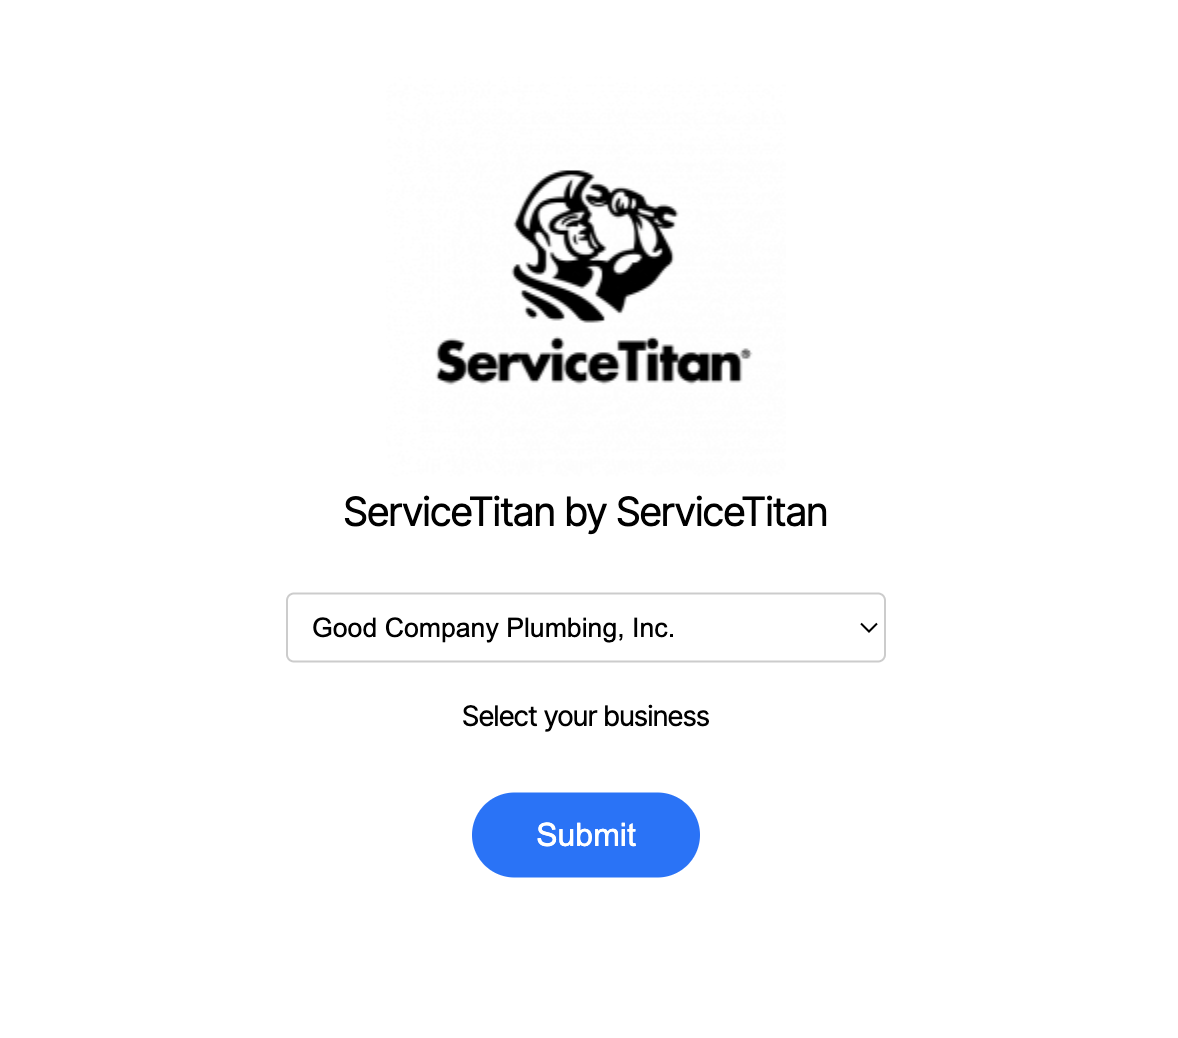
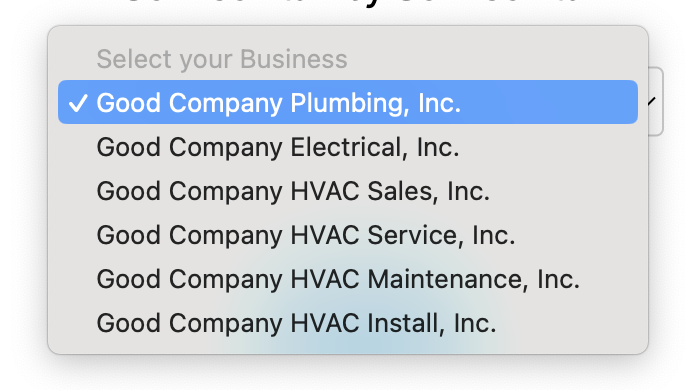
On the resulting page, you will select the organization you would like to connect with LiveSwitch. If you only have one organization in ServiceTitan, select the single item in the list. If you have multiple organizations, select the organization you would like to connect before hitting submit.
Once you hit submit, the final pieces should kick off and complete automatically. If you run into any issues, please contact [email protected]
Updated 5 months ago